How to Solve Quadratic Equations on a TI-84 Calculator
When you first see a quadratic equation, it usually feels harder than it actually is. The square sign on x makes it look confusing, and many students think they need to remember long formulas every time. That is where most people start to lose confidence.
The truth is, once you start using a TI-84 calculator, things begin to feel much easier. You do not have to solve everything by hand anymore. The calculator helps you see what is happening instead of just guessing the answer.
At the start, it may still feel a bit slow. You might press the wrong button or get confused about where to go. That is completely normal. Every student goes through that phase. But after a few tries, everything starts to make sense.
In this guide, you will learn how to solve quadratic equations on a TI-84 calculator step by step. We will go slowly and explain each part in a simple way so you can follow without stress.
What is a Quadratic Equation
Before using any TI-84 quadratic solver, it is important to understand what a quadratic equation really is.
A quadratic equation is simply an equation where the highest power of x is two. That means you will always see x² in it. That is the main thing that makes it different from other equations.
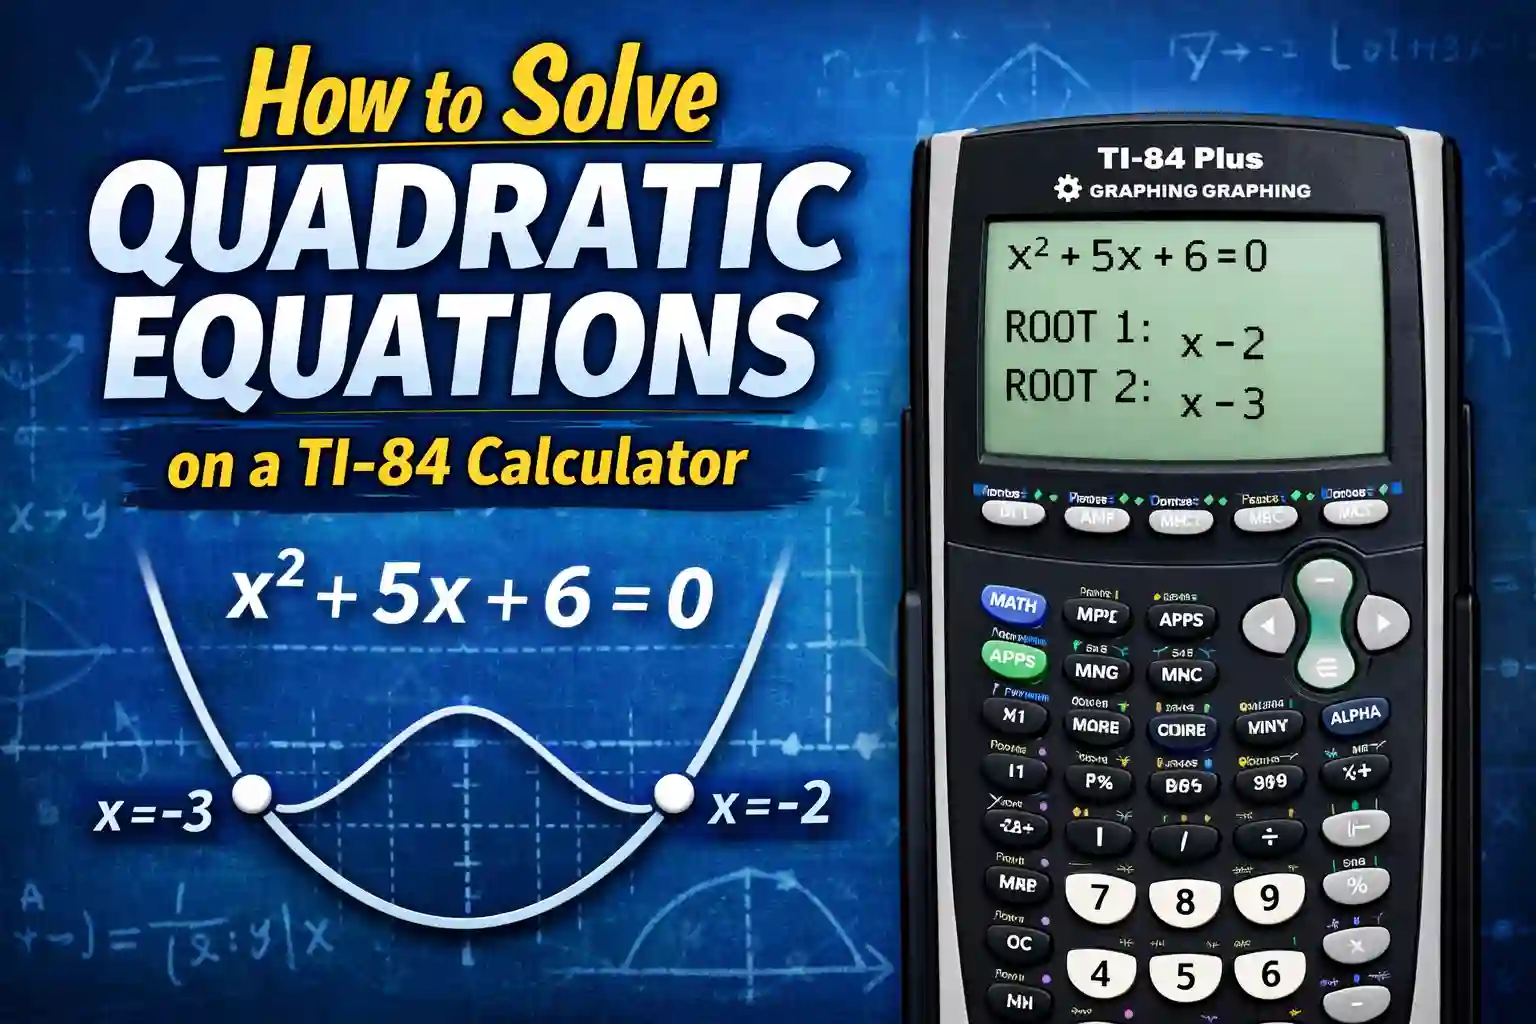
For example, x² + 5x + 6 = 0 is a quadratic equation. Another example is 2x² − 3x − 2 = 0. Even though the numbers change, the structure stays the same.
These equations usually have two answers. These answers are called roots. When you solve quadratic equations on a TI-84 calculator, you are basically finding those roots in a faster and easier way.
Sometimes both answers are different, and sometimes they are the same. You will understand this better once you start using the calculator.
Why Students Use TI-84 Calculator
If you try solving quadratic equations by hand, you will notice that it takes time. You have to follow steps carefully, and even a small mistake can give you the wrong answer.
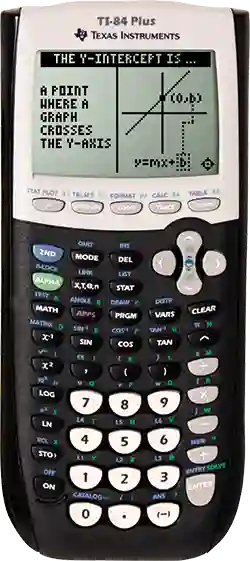
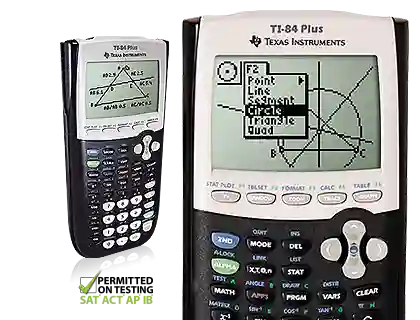
This is why many students use a TI-84 graphing calculator. It works like a built-in TI-84 quadratic solver that helps you solve equations without doing long calculations.
Another useful thing is that it shows you a graph. This graph is not just for show. It actually helps you understand where the answer comes from.
For example, when you graph a quadratic equation, you see a curved line. This line tells you how the equation behaves. When the line touches the x-axis, that point is your answer.
If you are practicing online, you can also use your TI-84 Online Calculator or Graphing Calculator Tool on your website to follow the same steps.
Understanding Graphing Method First
Before jumping into steps, it is better to understand the idea behind graphing.
When you graph a quadratic equation, the calculator draws a curve called a parabola. This curve can open upward or downward depending on the equation.
Now here is the important part. The points where this curve crosses the x-axis are the answers. These points are also called roots or zeros.
So instead of solving the equation directly, you are using the graph to find where the equation becomes zero.
This method is very helpful for beginners because it shows you what is happening instead of just giving you numbers.
Graphing Quadratic Equations on TI-84 (Step Explained Slowly)
Let’s take a simple equation so you can follow easily. Suppose the equation is x² + 5x + 6 = 0.
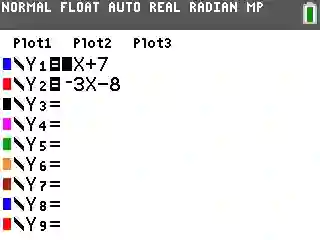
Start by turning on your calculator. Then press the Y= button. This takes you to the screen where you can enter equations.
Now type x² + 5x + 6. You do not need to write equals zero because the calculator already understands that part.
After entering the equation, press the GRAPH button. Now you will see a curved line on your screen. This is your equation drawn as a graph.
At first, the graph might not look very important, but this is where the answer is hidden.
Finding the Roots Using the Graph
Now comes the part where you actually find the answer.
Look at the graph carefully. You will see that the curve touches or crosses the x-axis at certain points. These are the roots of the equation.
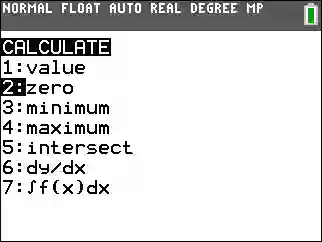
To find them exactly, press the 2nd button and then TRACE. A small menu will open.
From this menu, choose the option called “Zero.” Now move your cursor near the point where the graph crosses the x-axis. Press ENTER a few times.
The calculator will show you the value of x at that point. That is your first answer.
Now do the same thing on the other side of the graph to find the second answer.
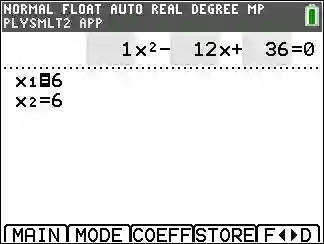
For this example, you will get x = -2 and x = -3.
Why This Method Works
At this point, it is important to understand why this method works.
Your equation is equal to zero. That means you are looking for values of x where the result becomes zero.
On the graph, the x-axis represents y = 0. So when the graph touches the x-axis, it means the equation equals zero at that point.
That is why those points are your answers.
A Small Mistake Most Students Make
One common mistake is that students find only one answer and stop there. But most quadratic equations have two answers, so you always need to check both sides.
Another problem happens when the graph is not visible properly. This usually happens because of zoom settings. If the graph looks too small or too big, you can use the zoom option to adjust it.
Take your time here. There is no need to rush.
When You Should Use This Method
This method is best when you are learning or trying to understand how equations work. It is also useful when you want to check your answer.
If you are preparing for exams, this method helps you build strong understanding.
But sometimes, you may want a faster method.
Moving From Graph Method to Faster Methods
In Upper section you learned how to solve quadratic equations on a TI-84 online calculator using the graph. That method is very helpful when you want to understand what is happening.
But let’s be honest. Sometimes you do not want to draw graphs again and again. If you are solving many questions, it can feel slow.
This is where faster methods help. Once you understand the basics, you can move to tools that give answers directly. The good thing is, your TI-84 calculator already has these tools built in.
Now we will look at the TI-84 equation solver steps and the polynomial solver. These methods are quicker, but still easy to learn.
TI-84 Equation Solver Steps (Fast Method)
The solver is one of the most useful tools in the TI-84 calculator. It works like a smart system that finds the value of x for you.
When I first tried it, I thought it would be confusing. But after using it a few times, it became one of the easiest methods.
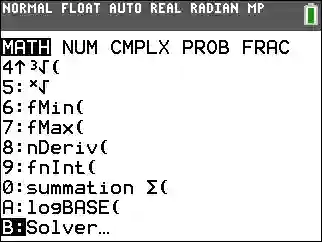
To open it, press the MATH button. Scroll down until you see “Solver.” When you open it, a new screen appears where you can type your equation.
Here is one thing you need to remember. In this method, you must write the full equation, including equals zero. For example, if your equation is x² + 5x + 6 = 0, you must type it exactly like that.
After entering the equation, move your cursor to x. Now type any number as a starting point. This is called a guess. It does not need to be correct.
Press ENTER, and the calculator will show you one answer.
To find the second answer, change the guess value and press ENTER again. The calculator will find the other root.
How Solver Actually Works (Simple Idea)
The solver works by checking values near your guess. It keeps adjusting until the equation becomes zero.
For example, if the answer is x = -2, the calculator will move step by step until it reaches that value.
That is why changing the guess helps you find the second answer. It tells the calculator to search in a different area.
This method is fast and very useful when you want to solve quadratic equations on a TI-84 calculator step by step without graphing.
A Small Trick That Saves Time
If you already have an idea about the answer, use that as your guess. This helps the calculator find the result faster.
For example, if the graph showed answers near -2 and -3, you can use -2 as a guess. This makes the process even quicker.
TI-84 Polynomial Solver (Direct Method)
Now let’s talk about an even faster method. This is the TI-84 polynomial solver. Many students do not use it at first, but once they learn it, they prefer it.
This method is different because you do not type the full equation. Instead, you only enter the numbers from the equation.
For example, in x² + 5x + 6 = 0:
- a = 1
- b = 5
- c = 6
These numbers are called coefficients.
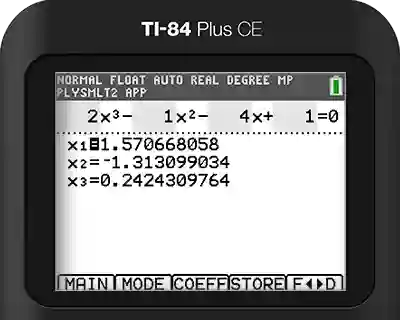
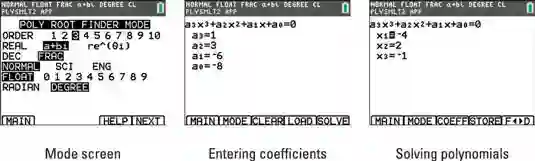
To use this method, press the APPS button and look for the polynomial solver. In many TI-84 calculators, it appears as PlySmlt2.
Open it and choose the option for a second-degree equation. Now enter the values of a, b, and c.
As soon as you enter these numbers, the calculator shows both answers.
Why This Method Feels Easier
This method is very clean. You do not need to draw graphs or try different guesses.
You just enter three numbers and get both answers at once.
This is why many students use this method when they are solving homework or practice questions quickly.
Graph vs Solver vs Polynomial (Which One to Use?)
Now you have learned three different methods. It is important to understand when to use each one.
The graphing method is best when you are learning. It helps you see how the equation behaves. If you are confused about the concept, this method clears things up.
The solver method is better when you want speed. It gives answers quickly, but you need to enter guesses to find both roots.
The polynomial solver is the fastest. It is perfect when you only need the answer and do not want extra steps.
Most students use a mix of all three methods depending on the situation.
One Example Using All Methods
Let’s take a simple example again. Suppose the equation is x² − 4x − 5 = 0.
If you use the graphing method, you will see the curve crossing the x-axis at two points.
If you use the solver, you will enter the equation and try different guesses.
If you use the polynomial solver, you will enter 1, -4, and -5.
All methods will give the same answers, which are x = 5 and x = -1.
This shows that all methods work correctly. The only difference is how you reach the answer.
Common Mistakes Students Make
Even with a calculator, small mistakes can happen.
Sometimes students enter the equation incorrectly. A small sign mistake can change the answer completely.
Another common mistake is forgetting to find both roots. Always check both answers.
Some students also forget to clear old equations from the calculator. This can cause confusion when graphing.
Take your time and check your work. It only takes a few extra seconds.
FAQs
How to solve quadratic equations on a TI-84 calculator step by step?
You can use graphing, solver, or polynomial methods. Graphing shows the answer visually, while solver and polynomial methods give answers directly.
What is the fastest method?
The TI-84 polynomial solver is the fastest because it gives both answers at once.
Why does the solver show only one answer?
It shows one answer based on your guess. Change the guess to find the second answer.
Is graphing still important?
Yes, graphing helps you understand the concept better, especially if you are learning.
Conclusion
Now you fully understand how to solve quadratic equations on a TI-84 calculator using different methods. At first, it may feel like there are many steps, but once you practice, everything becomes easier.
The important thing is to not rush. Try each method and see which one feels comfortable. Over time, you will start solving these equations quickly without confusion.
Your TI-84 calculator online is not just a tool to get answers. It helps you understand math in a better way if you use it properly.